In a world where every account demands yet another password, and every cloud service, such as AWS, relies on the reliability of these keys, password managers like Bitwarden act as saviors. They not only store our keys and passwords but also make their management significantly more convenient. However, even with such a powerful tool like Bitwarden, we encounter a limitation: it cannot automatically update and change the keys and passwords used in cloud services. So, what do you do when manually updating keys and passwords becomes a tedious and inefficient task? In this article, we explore how to combine the user-friendliness of Bitwarden with effective automation methods for managing AWS credentials. Imagine – no more monotonous manual password entry and updates. But, for that, you’ll have to put in a little effort. Well, let’s dive in and get started…
Why Bitwarden, you might wonder?
Choosing a tool to manage passwords and AWS keys is never an easy task. However, after some contemplation, I settled on Bitwarden, and here’s why it became my choice:
- Support for All Devices: Bitwarden operates on all platforms I use, making it an ideal solution for my needs. It has native desktop clients for Windows, Linux, and MacOS. There are native mobile apps for iOS and Android, a dedicated app for Apple Watch, command-line clients for various platforms, browser extensions for Chrome, Safari, Firefox, and many other browsers, and a web version accessible from any device with internet access and a browser.
- Simplicity and User-Friendliness: Despite its high-security standards, Bitwarden remains intuitive and easy to use, making it accessible to everyone. The nearly instantaneous secure data synchronization with a centralized cloud storage system is especially delightful. A secret added on one client becomes almost instantly available on others. For the security-conscious, you can opt not to use Bitwarden’s native cloud storage and, instead, go for a self-hosted installation, keeping all secrets where you personally prefer, even on the same device.
- Two-Factor Authentication and TOTP: Support for two-factor authentication and TOTP is a crucial feature, enabling the generation of temporary one-time passwords (TOTP) directly within the application. This significantly streamlines the two-factor authentication process, allowing you to store and quickly use TOTP for various websites and applications. In particular, Bitwarden can be utilized as a Virtual MFA for AWS authorization.
- Open API and Open Source: The presence of an open API and command-line interface in Bitwarden allows me to integrate this service into various scenarios and automate password and key management processes. The open-source nature facilitates security audits and makes it easier to extend and enhance the service, implementing new features, including alternative clients and even servers. For instance, there’s a completely rewritten server component in Rust with full support for the native API and additional features available only to Premium subscribers.
As for drawbacks, perhaps the only notable one is the lack of a built-in feature to update passwords and keys for specified services. This limitation, we’ll attempt to address.”
(Note: The last sentence mentions addressing a limitation, and it’s recommended to elaborate on this depending on the context of your blog or article.)
Adding AWS IAM User Data to Bitwarden
Let’s assume, for example, that you use AWS cloud for your tasks. In this scenario, you might be working with one or multiple AWS accounts, each having a personal IAM user account for which you need to regularly change the password. Ensure that the necessary permissions are configured.
Firstly, let’s make sure that all required data for logging into AWS is already entered into Bitwarden. When accessing the AWS console, you typically need to enter the IAM username and its password. It’s also crucial to store in Bitwarden your AWS account number or its alias, necessary for access. This ensures that you always have all the data at your fingertips for quick and secure access to your AWS account.
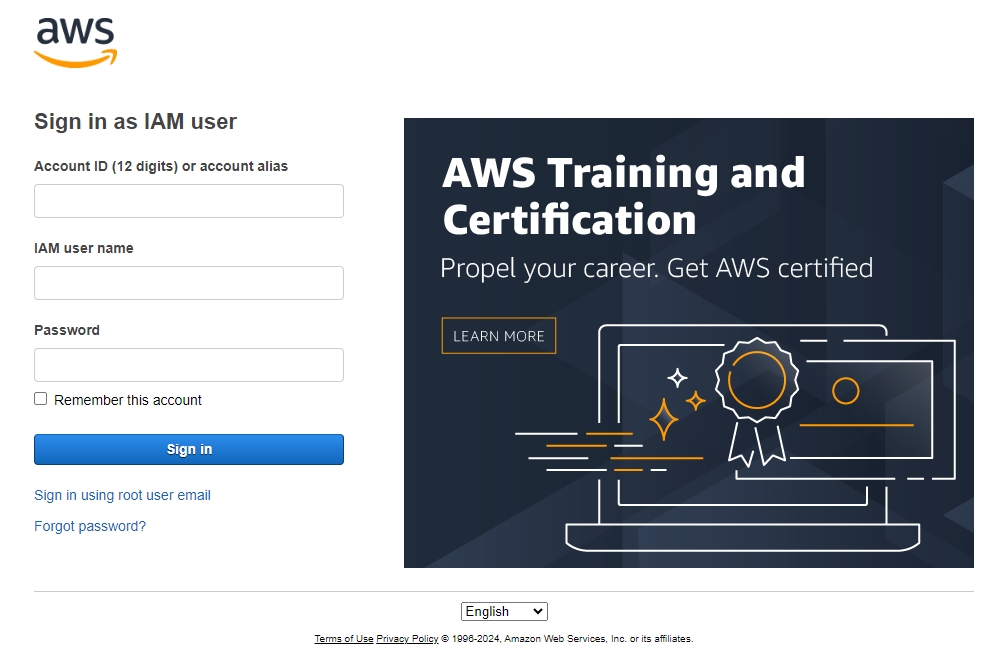
Let’s add the relevant data to Bitwarden using the mobile or desktop client. When using the Bitwarden browser extension, it automatically suggests saving filled login details, creating a new entry. However, we won’t rely on this and will attempt to set everything up manually for now.
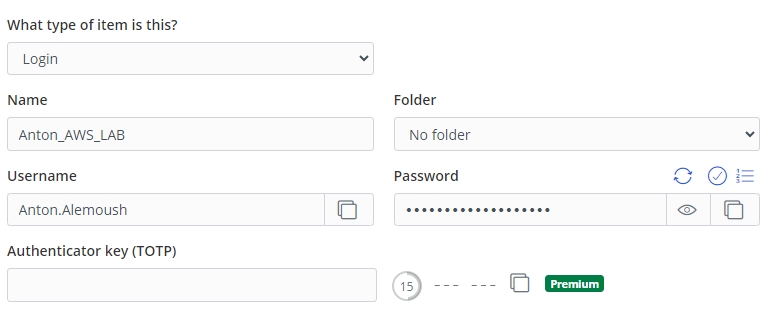
We enter the username in the Username field and the password in the Password field. The Name field serves as a simple login card name and can be used for quick search among other logins. If you have multi-factor authentication enabled in your AWS account, and Bitwarden is added as a Virtual MFA device for your account, the TOTP field will display the corresponding otpauth://totp/Amazon%20Web%20Services:… value. You can add these details to the login card using the Bitwarden mobile app by scanning the QR code generated by Amazon when adding the MFA device.
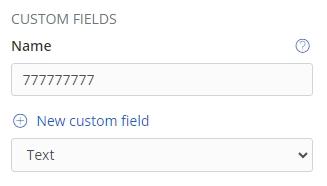
It’s also helpful to add an additional account field with the AWS account identifier in the CUSTOM FIELDS section if we don’t want to manually enter or copy it into the login form every time.
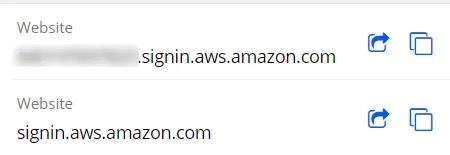
In the Website field, you can add the corresponding URL, so when using the Bitwarden client or browser extension, it can automatically fill in the login form with the necessary data
Setting Up the CLI
We’ve got the IAM user data saved for AWS Console login. Yet, we aim to avoid the manual repetition of this task and updating the saved information in Bitwarden manually each time. To streamline this process, we require the following tools:
- POSIX Shell (Bash, Zsh, etc.) For Windows, you can create a version for cmd or PowerShell, but having a working WSL seems unnecessary.
- AWS CLI
- Bitwarden command-line interface (CLI)
- jq
I won’t go into details about installing and configuring these tools, but I’ll highlight the most significant points.
To automate actions with the Bitwarden CLI, we need to establish authorization. This can be achieved through various methods. The user-friendly approach involves creating a personal API key, accessible through your Bitwarden profile. Subsequently, you’ll need to run the following command in the console.
bw login --apikeyProvide the relevant client_id and client_secret information when prompted. Alternatively, you have the option to configure the corresponding environment variables BW_CLIENTID and BW_CLIENTSECRET.
To work with the data, we need not only a successful login but also to unlock the secret vault. This can be done manually using the command
bw unlockTo unlock, you will also need to enter the master password, providing access to encrypted data. It’s advisable to do this only when actively working with the data. After finishing the work, execute the command ‘bw lock.’
Upon successful unlocking, a temporary session key will be generated, which we need to use for any data-related operations. We need to set it as an environment variable for executing further commands:
export BW_SESSION="LKaxxcvfd+Urt798022CBNadr/fhzYurtyqnxgcujdfsdd=="If we need to perform a fully automated login and unlock procedure, this can also be achieved by setting the appropriate environment variables. In addition to the mentioned BW_CLIENTID and BW_CLIENTSECRET, we will also need the BW_PASSWORD variable, to which we will assign the value of our master password used for unlocking the secret vault.
bw unlock --passwordenv BW_PASSWORDAfter execution, Bitwarden will return the value of the BW_SESSION variable in the standard output, formatted as a command ready for execution. If we want to fully automate this process, unlocking can be done as follows:”
$(bw unlock --passwordenv BW_PASSWORD | awk '/export/ {print $2, $3}')
This way, we will unlock the vault and set the correct value for the BW_SESSION variable without additional manual steps. After this, you can execute the command
bw syncNow, you can proceed with the automation of specific tasks.
Changing the Password for AWS IAM User Let’s take the record we created earlier for the user ‘anton.alemoush’ and attempt to implement a mechanism to change his password with automatic updating of the corresponding entry in Bitwarden.
Firstly, let’s explore the data structure inside the record when accessed through the Bitwarden CLI. To display the record data for our login named ‘anton_AWS_LA,’ use the following command:
> bw get item anton_aws_lab --pretty
{
  "passwordHistory": null,
  "revisionDate": "2024-01-01T00:01:29.890Z",
  "creationDate": "2024-01-01T00:01:29.890Z",
  "deletedDate": null,
  "object": "item",
  "id": "85ab9e21-3c8f-4a67-8b9d-2d64e1bcf0b7",
  "organizationId": null,
  "folderId": "a1e8b39d-4fa7-4aa5-8d8c-7c97977bc53f",
  "type": 1,
  "reprompt": 0,
  "name": "anton_aws_lab",
  "notes": null,
  "favorite": false,
  "fields": [
    {
      "name": "account",
      "value": "777777777",
      "type": 0,
      "linkedId": null
    }
  ],
  "login": {
    "fido2Credentials": [],
    "uris": [
      {
        "match": null,
        "uri": "https://ap-southeast-2.signin.aws.amazon.com/"
      }
    ],
    "username": "annton.alemoush",
    "password": "My_R@nd0m_$tr1ng",
    "totp": null,
    "passwordRevisionDate": null
  },
  "collectionIds": []
}
We observe that a record has various attributes, but our focus is on the fundamental ones: id, login.username, and login.password. While the name field can be used for record retrieval, it may not be uniquely identifying, potentially resulting in multiple records. To refer to a specific record, it is preferable to use its unique identifier from the id field. Let’s assign its value to a specific variable for convenience:
BW_ITEM_ID="85ab9e21-3c8f-4a67-8b9d-2d64e1bcf0b7"Now, let’s retrieve the old password from the Bitwarden record using its ID:
OLD_PASSWORD=$(bw get password "$BW_ITEM_ID")Let’s generate a new random password using the command bw generate:
NEW_PASSWORD=$(bw generate --length 16 --uppercase --lowercase --number --special)Here, specifying parameters for generating a new password includes its length (16 characters), the requirement for uppercase letters, lowercase letters, numbers, and special characters. As a result, the NEW_PASSWORD variable will hold a random string like 5+15AqJK#@6CAnton%.
Now, using the old password, we can set a new one for our account with the aws iam change-password command. To execute this command, you’ll need a configured and functioning AWS CLI. I won’t delve into the detailed setup of this tool here. It’s worth noting that if you use different AWS accounts, you likely have different profiles set up for command-line access with distinct keys for corresponding accounts. Therefore, when invoking the command, you’ll also need to specify the AWS profile using the AWS_PROFILE variable. If you don’t have multiple profiles in your AWS CLI settings, or if you use another source for AWS access keys (e.g., environment variables), you can skip this parameter. The resulting command looks like this:
aws iam change-password \
    --old-password "$OLD_PASSWORD" \
    --new-password "$NEW_PASSWORD" \
    --profile "$AWS_PROFILE" && \
    echo "Password changed successfully for profile '$AWS_PROFILE'." || {
      echo "Failed to change password for profile '$AWS_PROFILE'."
      return 1
    }
If AWS CLI access is configured correctly, and the OLD_PASSWORD variable matches the value of the old password, and the NEW_PASSWORD variable meets the requirements for the AWS account password, then the command will execute successfully, and an appropriate message will be displayed on the screen. If, for some reason, the command doesn’t complete successfully, a corresponding message will indicate the issue.
Assuming everything went well, the new password is now set. All that remains is to edit our record for the anton.alemoush account in Bitwarden to update the password value for that entry. To achieve this from the command line, we’ll need to use the jq utility for working with JSON. The final command to update the password in the relevant Bitwarden record will look like this:
bw get item "$BW_ITEM_ID" | jq --arg password "$NEW_PASSWORD" '.login.password = $password' | bw encode | bw edit item "$BW_ITEM_ID" >/dev/null
If the final command’s output isn’t redirected to /dev/null, the complete JSON for our record, including all secrets, will be displayed on the screen, which may not always be desirable when working in the console. Therefore, it’s better to disable this output for automated tasks.
In the end, using Bitwarden CLI, AWS CLI, and jq, we were able to generate a new password for our selected AWS user account and update the corresponding entry in our Bitwarden vault.
Now, let’s consolidate these commands into a single unified function that we can invoke with a single command from the console. The result will be something like this:
rotate_aws_password() {
  local AWS_PROFILE=my_profile
  local BW_ITEM_ID="85ab9e21-3c8f-4a67-8b9d-2d64e1bcf0b7"

  # Fetch the old AWS console password from Bitwarden
  OLD_PASSWORD=$(bw get password "$BW_ITEM_ID")

  # Generate new random password using Bitwarden CLI
  NEW_PASSWORD=$(bw generate --length 16 --uppercase --lowercase --number --special)

  # Use AWS CLI to change the password with the specified profile
  aws iam change-password \
    --old-password "$OLD_PASSWORD" \
    --new-password "$NEW_PASSWORD" \
    --profile "$AWS_PROFILE" && \
    echo "Password changed successfully for profile '$AWS_PROFILE'." || {
      echo "Failed to change password for profile '$AWS_PROFILE'."
      return 1
    }

  # Update the password in Bitwarden
  bw get item "$BW_ITEM_ID" | jq --arg password "$NEW_PASSWORD" '.login.password = $password' | bw encode | bw edit item "$BW_ITEM_ID" >/dev/null

  # Clear the entered passwords from the shell environment for security
  unset OLD_PASSWORD NEW_PASSWORD
}
If you add this code to your shell profile (.bashrc for Bash, .zshrc for Zsh, etc.), you can execute the entire sequence of actions described above with just one command:
> rotate_aws_password
Password changed successfully for profile 'my_profile'.
You can check the entry in the corresponding Bitwarden card and make sure that the password for the anton.alemoush account has indeed been updated.
Conclusion
We’ve explored an example of automating password rotation for an AWS account using simple shell scripts, along with the automatic update of saved passwords in the Bitwarden vault. Similarly, one can automate the rotation of AWS CLI access keys, obtain temporary tokens for AWS access using MFA, and so on. If there is interest, I’ll consider covering these aspects in future articles. I hope this article proves helpful in streamlining your work with AWS and Bitwarden.
